Image and Annotation
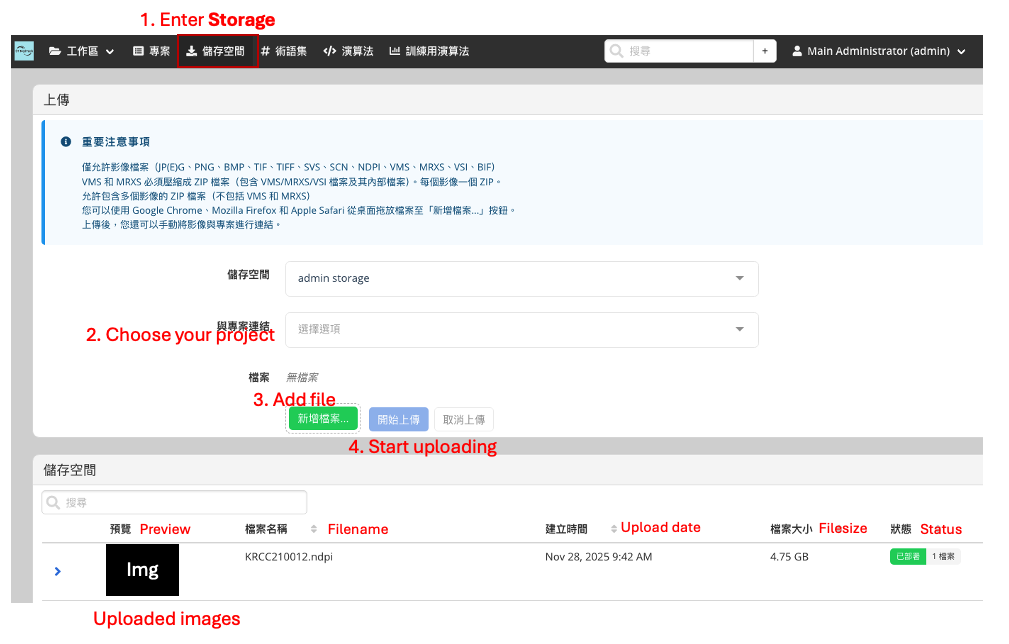
16 minutes1. Image Upload
- In the sidebar on the homepage, select Storage to upload images to a specific project.
- Click New File and choose the WSI file you wish to upload.
- The storage area below will display a list of all uploaded images.
You may also view images via:
Project Space → Left Panel Images
Here you can see detailed information for each image, including:
- Image name
- Thumbnail
- Magnification
- Number of annotations
- Uploader and creation time
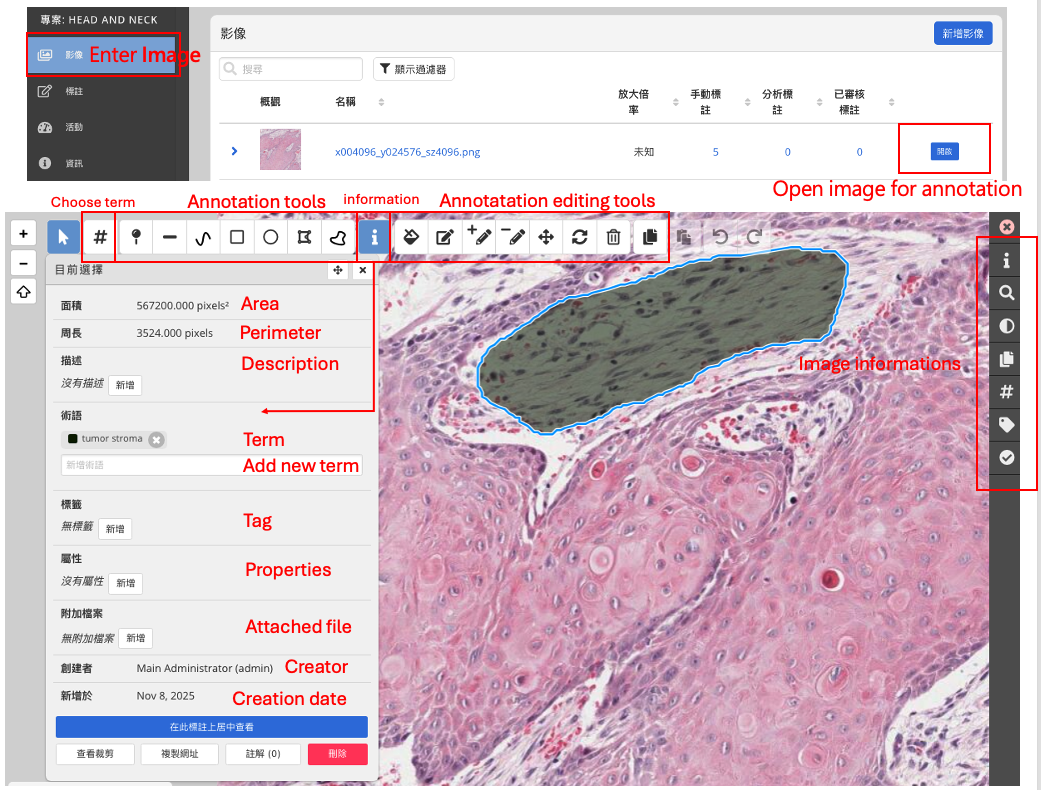
2. Image Annotation
After entering a project, click any image under the left Images panel to begin annotating.
2.1 Annotation Toolbar (Top)
The platform provides multiple annotation tools:
- Point
- Line
- Freehand line
- Polygon
- Freehand polygon
- Circle
- Rectangle …etc.
2.2 Annotation Operations
After clicking or drawing an annotation region, you can:
- View the area and perimeter of the region
- Add a Description
- Assign a Term
- Add Tags
- Add Properties (fields used for model training)
You may also:
- Fill annotations
- Modify shapes
- Delete annotations
2.3 Right Sidebar (Image View Controls)
The right sidebar provides image viewing and adjustment functions, including:
- Magnification
- Brightness / contrast / saturation / hue adjustments
- Toggle annotation layers
- Display term categories
- Display property-based annotation colors
- Annotation review status (Unreviewed / Reviewed)
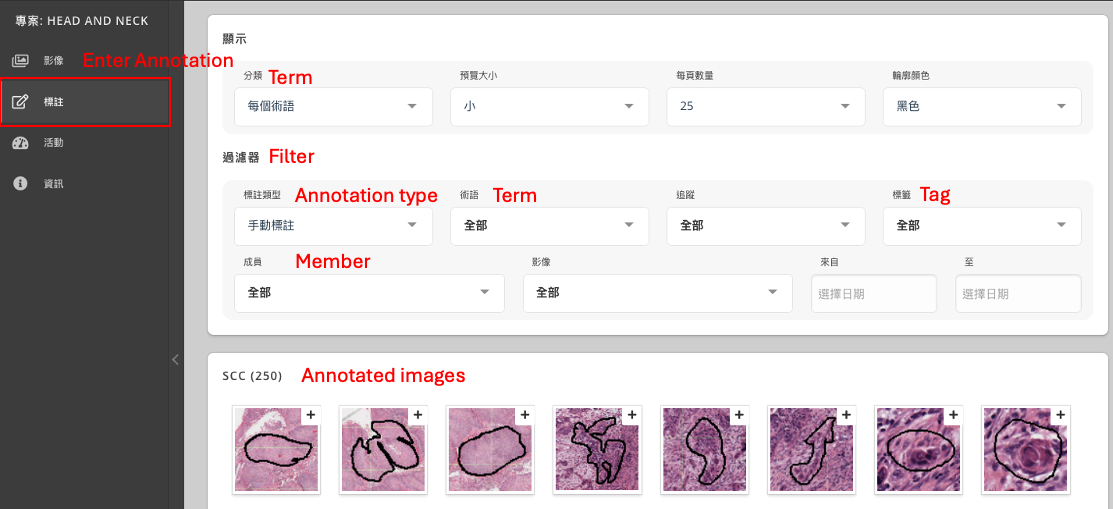
2.4 Annotation Overview
In the left project menu, click Annotations to view all annotation information within the project.
Available actions:
- View annotation statistics for each image
- Download annotation details (CSV / Excel / PDF)
- Import / export annotations
Downloaded data includes:
- Annotation x, y coordinates
- Area and perimeter
- Term
- Cytomine Annotation URL (can be used directly with the API)